To add an Auto Attendant, click the Add Auto Attendant button, found on the right side of the page. The Add an Auto Attendant window will appear as seen below.

Name the Auto Attendant and give it an extension. This name should allow you to differentiate this Auto Attendant from other Auto Attendants you have created.
Select a Time Frame for the frame to which this answering rule will be applied.
Click Add button to create the Auto Attendant.
NOTE: The extension cannot be changed once the Auto Attendant has been created.
Once you create the Auto Attendant, the following screen will pop up.
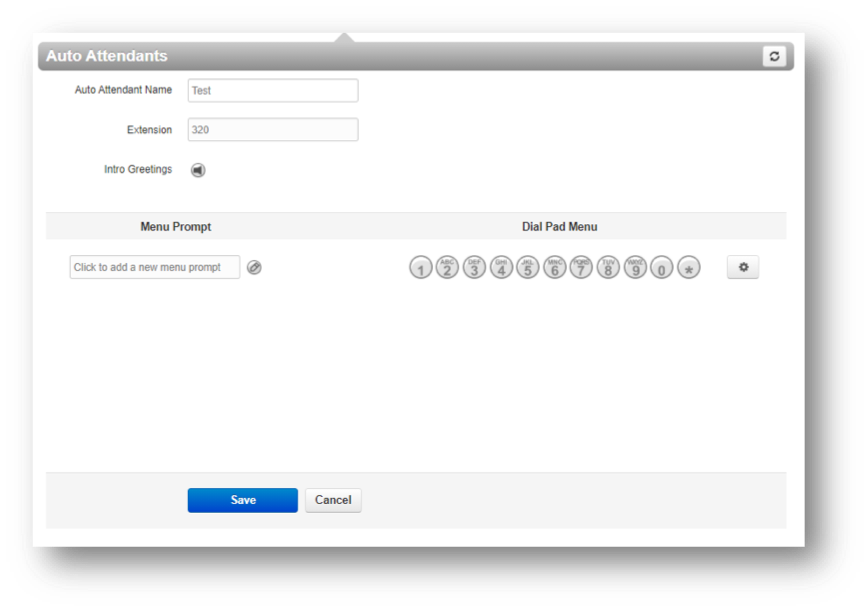
Complete the fields as defined below:
Auto Attendant Name – this is the name you entered on the previous page. Use this field to change the name if desired.
Extension – This is a read-only field showing the extension associated with this Auto Attendant you entered on the previous page.
Intro Greeting – Click the icon to display the Manage Greeting pop-up window and play, upload, record, or delete greetings. See the Intro Greetings section for more information.
Menu Prompt – Click in the text box or click the icon to upload or record a menu prompt.
Dial Pad – Routes calls to various resources when a caller selects that option. Click a number. Details on the Dial Pad Menu can be found in Auto Attendant Dial Pad Options.